

Minor pentatonic scale positions turn a scary-looking fretboard into five repeatable shapes you can actually navigate. This guide covers where each position sits, a practical drill for connecting them, and how to use them inside Harniciuk Sonic’s tools.
Why minor pentatonic scale positions matters
A minor pentatonic scale has only five notes, which makes it forgiving, but the five box positions only pay off once you know where the root note falls in each one and how the boxes connect along the neck. Work slowly enough to notice timing, unwanted noise and tension. Then increase the difficulty only when the movement stays relaxed.
Keep one measurable goal for each session. A clear goal might be four clean repetitions, one complete chorus without stopping, or a recording that stays in time. Small evidence is more useful than practising for a long time without listening.
The Five Positions: A Minor Pentatonic Example
The minor pentatonic scale has five notes. For A minor pentatonic, a common key to start with, those notes are A, C, D, E and G. What actually makes the five positions usable is knowing where the root note (A) sits in each one, and how each position overlaps the next so you can slide between them instead of jumping.
Position 1: Root on the low E string, 5th fret. This is the box most players learn first, spanning roughly frets 5 to 8.
Position 2: Root on the A string, 7th fret. It sits just above Position 1, sharing its top two frets, which makes it the easiest place to practice sliding between the two.
Position 3: Root repeats on the D string around the 9th–10th fret.
Position 4: Root back on the low E string, 12th fret, one octave above Position 1.
Position 5: Root on the low E string, 2nd–3rd fret, below Position 1 on the neck.
To transpose to a different key, find the note you want as your root on the low E string and use that fret as the new Position 1 — the shapes themselves don’t change, only where you place them. Note that the Scale Generator diagram above is a general fretboard reference; always check the actual note names against the positions listed here when you’re first learning them.
A step-by-step method
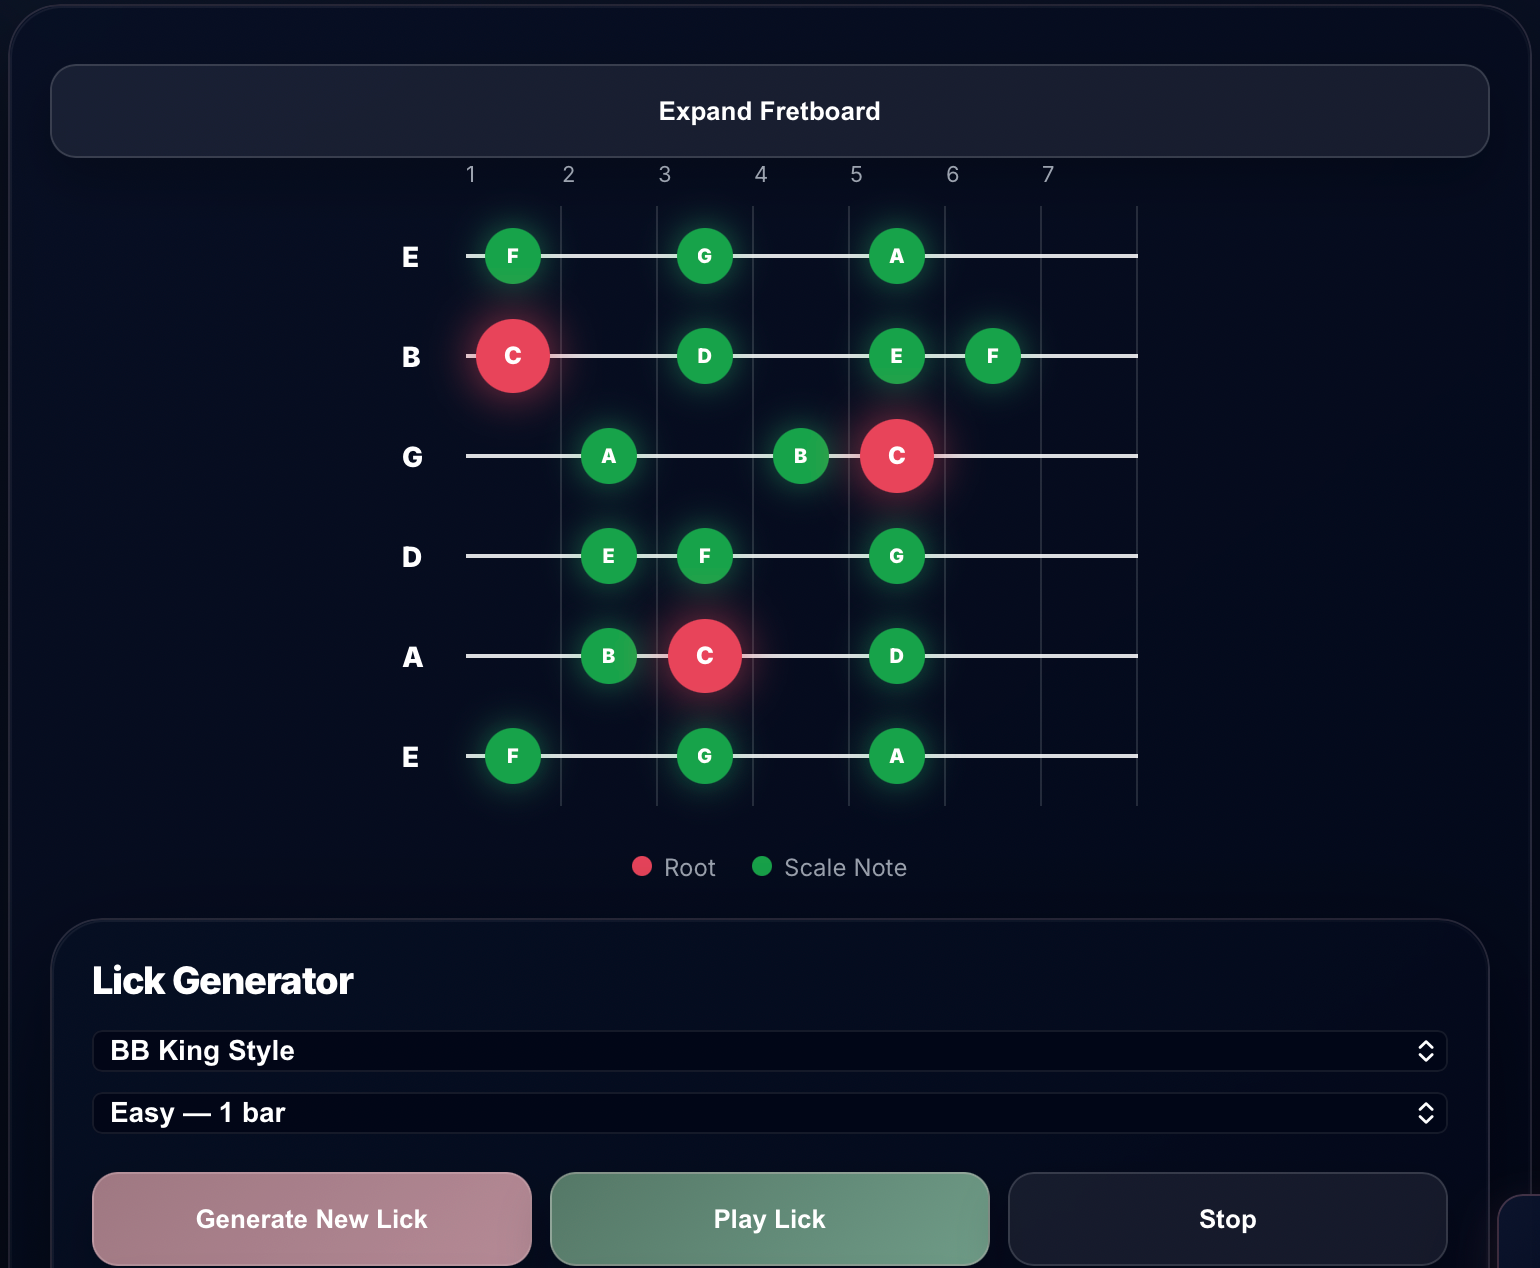
Start with one position, mark every root and connect it to the next position using a slide on one string.
- Set one musical goal and remove unnecessary options.
- Play slowly enough to stay accurate and relaxed.
- Record or listen back before increasing speed.
- Repeat the successful version, then change only one variable.
This sequence keeps the ear involved. It also prevents the common habit of changing tempo, tone, fingering and harmony at the same time. When only one variable changes, you can understand why the next attempt improved.
A focused practice drill
Create a two-bar phrase that begins in one position and ends in another. Repeat it in three keys without changing the rhythm.
Use three rounds: an orientation round, a clean repetition round and a musical round. During the last round, add dynamics, articulation and phrasing. The goal is to turn a technical action into something you could use in a riff, lesson, rehearsal or recording.
Common mistakes to avoid
Do not treat all five notes as equal stopping points. Resolve phrases deliberately to the root or a chord tone.
Another mistake is continuing after concentration drops. Stop, identify the exact problem and restart with a smaller task. Ten attentive minutes usually create a better result than an unfocused hour.
Use the result with Scale Generator
Display the minor pentatonic scale, highlight roots and practise over a matching backing track. Open the tool, complete one useful action and then continue to a lesson, backing track or upload. This keeps practice connected to real music.
Build a connected guitar workflow
Harniciuk Sonic connects practice, learning, creation and publishing. Start with the guitar tools, use a focused exercise, and continue with the Lessons Hub when you need a structured next step. Creators can turn the finished idea into a TAB, lesson or marketplace resource.
Frequently asked questions
How long should I practise this?
Start with ten focused minutes. Continue only while you can hear and correct the result. Consistency across several days matters more than one exhausting session.
When should I increase the difficulty?
Increase tempo, range or complexity after several relaxed and accurate repetitions. If timing or tone collapses, return to the last version you could control.
Do I need special equipment?
No. A guitar, careful listening and the relevant Harniciuk Sonic tool are enough to begin. Headphones or a simple recording can make evaluation easier.
Related reading
Pentatonic shapes make more sense once you can hear the harmony behind them — see Common Guitar Chord Progressions Explained, and pick up more practice ideas in Best Online Guitar Practice Tools and How to Use Them.
Practice smarter with Harniciuk Sonic’s free guitar tools — open Chord Analyzer and level up today.
Want a structured, ready-made practice pack? Check out the Pentatonic pack in the Harniciuk Sonic shop.