
Guitar Guides · Notation & TAB
Guitar tablature is the fastest way to learn songs, write riffs, and share ideas — no music theory required. Here’s everything you need to know.
🕑 8 min read
🎸 All levels
📅 Updated June 2026
Guitar TAB is the universal language of guitarists. Unlike traditional sheet music, which requires years of training to read fluently, TAB can be understood in minutes. Every riff, solo, and chord progression you’ve ever learned from the internet was almost certainly written in tablature.
Quick Answer
Guitar TAB (tablature) uses six horizontal lines representing the six strings, with numbers indicating which fret to press. You read left to right, just like text. Symbols above the numbers show techniques like bends, slides, hammer-ons, and pull-offs. The Harniciuk Sonic TAB Creator lets you write, play back, and print your own TABs directly in the browser.
What is guitar TAB and how does it work?
A guitar TAB is a diagram of the guitar neck seen from the player’s perspective. Six horizontal lines represent the six strings — the bottom line is the lowest-pitched string (Low E), and the top line is the highest (High e). Numbers on the lines tell you which fret to press on that string. Zero means you play the string open, without pressing any fret.
How to read TAB — basic structure
e|—0—2—3—2—|
B|—1—3—3—3—|
G|—0—2—0—2—|
D|—2—0—0—0—|
A|—3—x—2—x—|
E|—x—x—3—x—|
Read left to right. Numbers = fret to press. 0 = open string. x = muted string. Notes stacked vertically = played simultaneously (chord).
Notes written one after another horizontally are played in sequence — as a melody or riff. Notes stacked vertically on multiple strings are played simultaneously — as a chord. The speed at which you play the notes is not indicated in basic TAB; that comes from listening to the original song or reading a BPM marking.
Guitar TAB symbols — the complete guide
Basic TAB only requires numbers, but as soon as you encounter real songs and solos, you’ll see technique symbols. These tell you how to play a note, not just which note to play.
| Symbol | Technique | How to execute it |
|---|---|---|
| h | Hammer-on | Pick the first note, then press the second fret without picking again. The note sounds from the finger pressure alone. |
| p | Pull-off | Press both frets simultaneously, pick the higher fret, then pull your finger off to sound the lower note without picking. |
| / | Slide up | Pick the first note and slide your finger up the string to the target fret without lifting it. |
| Slide down | Same as slide up but moving toward the headstock — from a higher fret to a lower one. | |
| b | Bend | Pick the note and push the string upward (or downward) across the fretboard to raise the pitch. 7b9 means bend from fret 7 up to the pitch of fret 9. |
| r | Release bend | Return a bent string to its original pitch — usually written after a bend: 7b9r7. |
| ~ | Vibrato | Repeatedly bend and release the string slightly to create a wavering pitch effect. |
| x | Muted note | Lightly rest a finger on the string without pressing it to the fretboard. Creates a percussive click sound when picked. |
| t | Tap | Use a picking-hand finger to tap a fret, producing a note without strumming. Common in rock and metal solos. |
| ( ) | Ghost note | A note played softly or implied — often used in fingerstyle or jazz TAB to indicate light emphasis. |
Reading TAB vs Sheet Music
TAB tells you exactly where to put your fingers but doesn’t show rhythm precisely. Sheet music shows rhythm precisely but requires training to read. Most guitarists learn TAB first and sheet music later — or never. For learning songs and writing riffs, TAB is faster and more practical than standard notation for the vast majority of situations.
The D’Angelico — a guitar that deserves its own TAB. Write riffs, licks, and solos the moment inspiration hits.
How to use the Harniciuk Sonic TAB Creator
The TAB Creator is a browser-based tablature editor that lets you write, play back, save, and print guitar TABs without any software installation. Here’s how to use it from start to finish:
01
Name your TAB and set the tempo
Give your TAB a name in the title field and set the BPM. The BPM controls playback speed — use a slower tempo while writing to hear each note clearly, then increase it to full speed to check how the riff sounds at tempo.
02
Set the time signature
Select 4/4 for most rock, pop, and blues. Use 3/4 for waltz-feel pieces, 6/8 for compound time, or 5/4 and 7/8 for odd-meter progressions. The time signature organizes the TAB into measures automatically.
03
Click a cell and enter the fret number
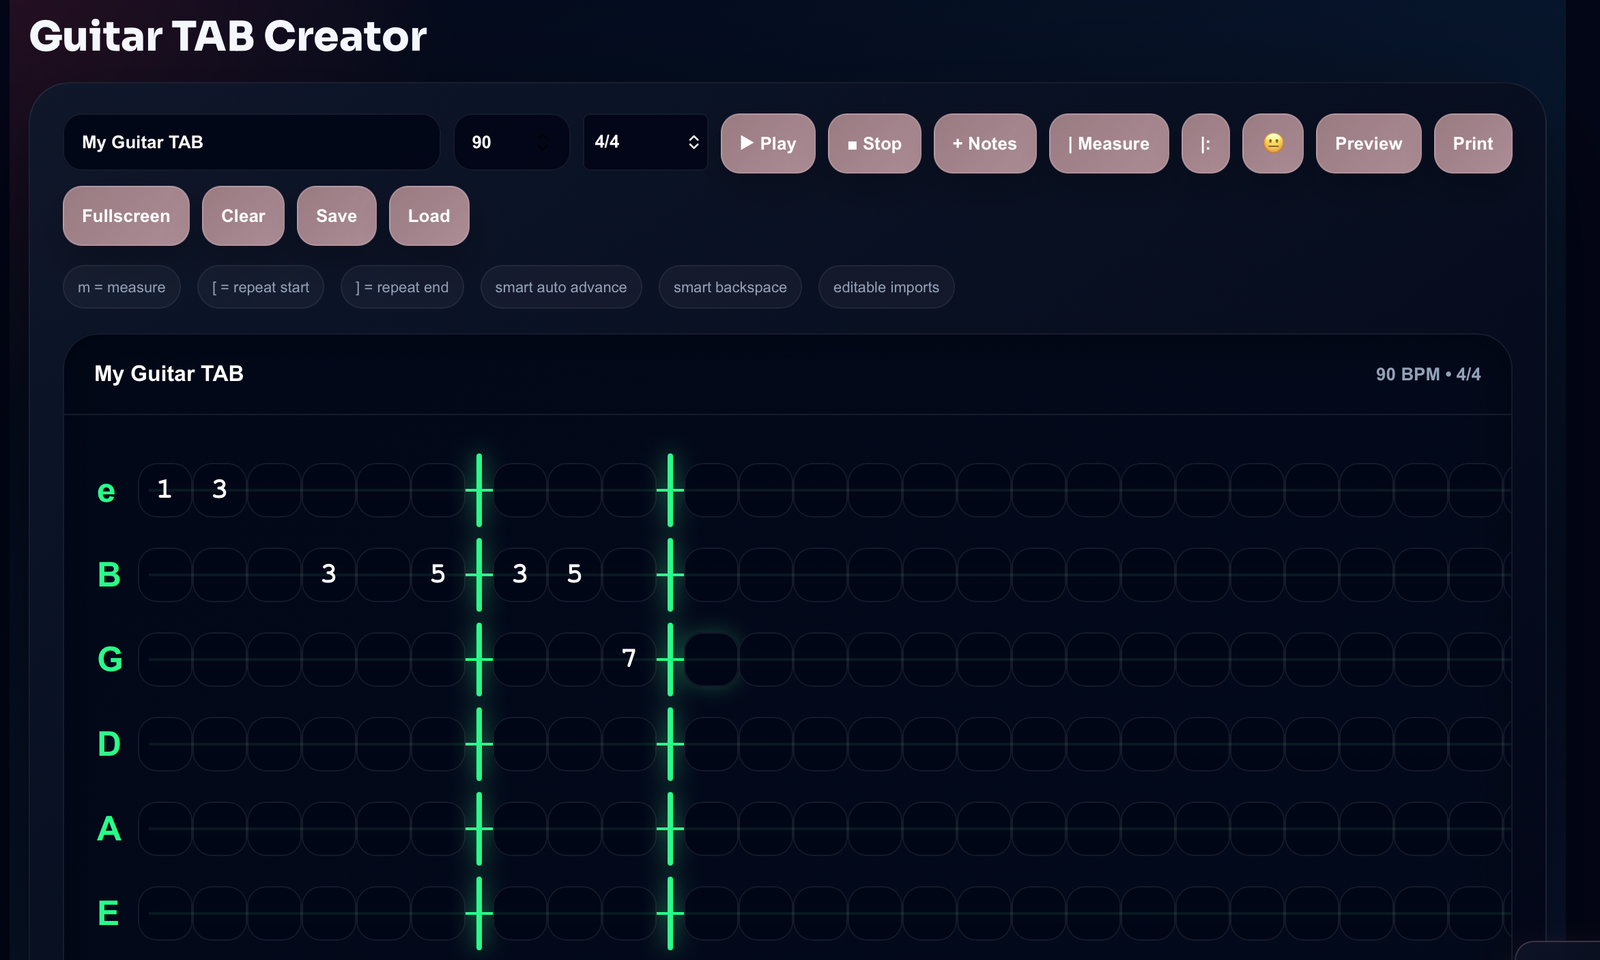
The TAB grid shows all six strings as rows. Click any cell to select it and type the fret number. The cursor advances automatically to the next beat — use Tab or the arrow keys to move manually. Type 0 for an open string, or x for a muted note.
04
Add measures as needed
Click “+ Measure” to add new measures to your TAB. Each measure maintains the time signature you set. Use the repeat markers ([ for repeat start, ] for repeat end) to indicate sections that loop — common for verse and chorus patterns.
05
Play back and review
Click Play — or press Space — to hear your TAB played back at the set BPM. The playhead moves through the grid in real time so you can follow along. Use Stop to pause and make corrections. The smart auto-advance feature moves the cursor forward automatically as you type, so entry is fast and uninterrupted.
06
Save, preview, and print
Click Save to store your TAB in the browser. Use Preview to see a clean, formatted view of the full TAB. Click Print to export it as a printable PDF — no watermarks, no sign-up required. Use Load to retrieve any previously saved TABs.
Guitar TAB Creator — harniciuksonic.com/tab-creator/
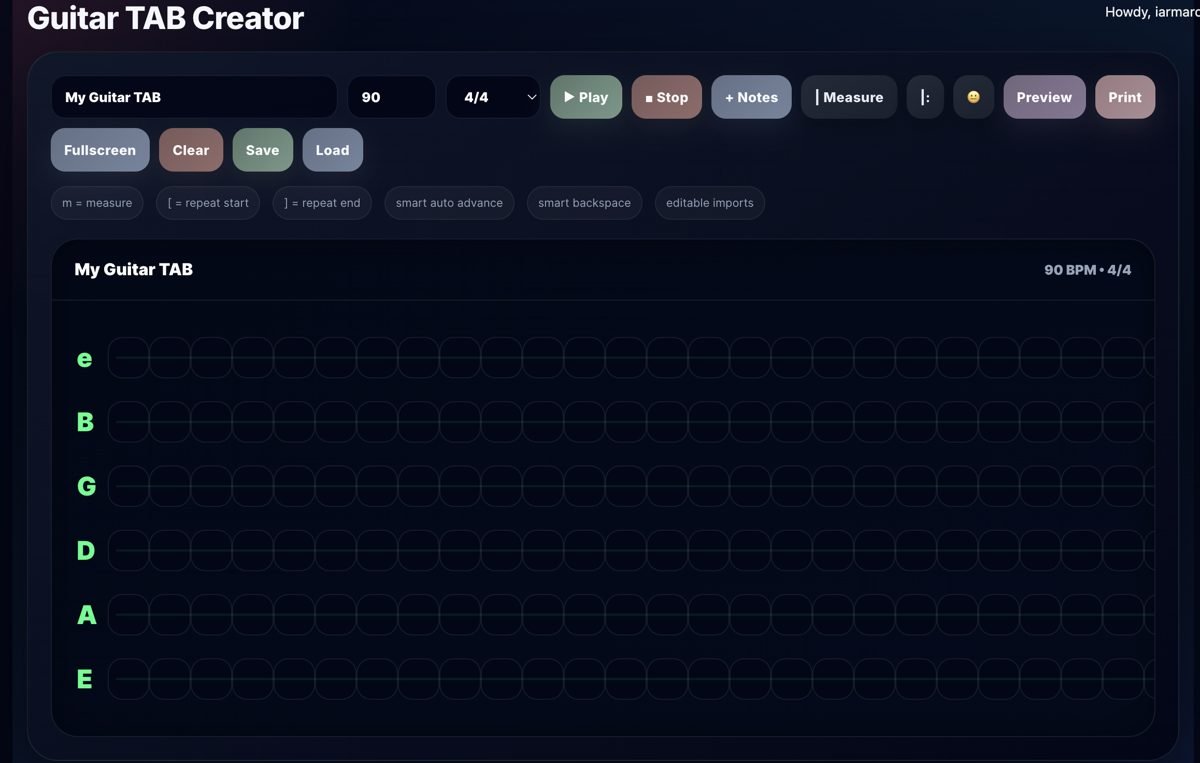
The TAB Creator: six-string grid, BPM and time signature controls, playback, save, and print — all in one browser tab.
TAB Creator keyboard shortcuts and features
Once you know the keyboard shortcuts, writing TAB in the creator is significantly faster than using a mouse for every action.
Space
Play / Stop
Start or stop playback without leaving the keyboard. Essential for checking sections as you write them.
← →
Navigate cells
Move left and right between beats within a measure. Add fret numbers without reaching for the mouse.
m
Add measure
Insert a new measure at the current position. Keep writing without interrupting your flow to click the toolbar.
[ ]
Repeat markers
[ adds a repeat-start marker, ] adds a repeat-end. Mark a verse or chorus to loop during playback.
Backspace
Smart backspace
Deletes the current cell content and moves the cursor back. “Smart” means it won’t accidentally delete an entire measure.
⇵
Auto-advance
After entering a fret number, the cursor moves forward automatically. Write an entire riff without lifting your hands from the keyboard.
Tips for writing better guitar TABs
Write what you’d actually want to read
The best TABs are clear and unambiguous. If you’re writing for yourself, shorthand is fine. If you’re writing to share, add technique symbols wherever the execution matters — a bend that’s written as just a number loses all the expression the notation is supposed to capture.
Set the BPM accurately
A TAB without a BPM is incomplete for anyone trying to learn it. Set the tempo at the start, even if it’s approximate. A player who doesn’t know the original song has no reference without it.
Use measures consistently
Keep your measure lengths consistent with the time signature. A 4/4 TAB where some measures have 5 beats will confuse anyone reading it — and will break playback in the TAB Creator. Use the repeat marker to indicate recurring sections rather than copying the same measure multiple times.
Write TABs from the Scale Generator and Chord Analyzer
The TAB Creator connects directly to the other tools on Harniciuk Sonic. Generate a lick in the Scale Generator PRO and click “Edit in TAB Creator” to send it over automatically. Do the same from the Chord Analyzer’s Progression Generator to convert a chord sequence to TAB in one click. This workflow — generate, edit, play back, print — is one of the most efficient ways to document your musical ideas.
From idea to TAB in 60 seconds
Open the Scale Generator PRO → select A minor blues → click “Generate New Lick” → click “Edit in TAB Creator.” Your lick appears as a ready-to-edit TAB with the correct notes already placed. Adjust anything you want, set the BPM, click Play to verify it sounds right, then Print. Your idea is documented before you forget it.
Free Tools
Write, play, print. All in one place.
TAB Creator, Scale Generator, Chord Analyzer, and Backing Track Generator — all connected, all free.
Guitar TAB Creator
Scale Generator PRO
Chord Analyzer
Backing Track Generator
Frequently asked questions
Is guitar TAB the same as sheet music?
No. Sheet music uses a five-line staff to show musical pitch using note symbols, and it accurately represents both pitch and rhythm. Guitar TAB uses a six-line grid to show fret positions and string choices, and while it shows pitch (via fret numbers), it represents rhythm less precisely. TAB is easier to read without formal training; sheet music is more universal across instruments.
Can I print TABs from the Harniciuk Sonic TAB Creator?
Yes — click the Print button to open a clean, formatted preview of your TAB that you can print directly or save as a PDF. No watermarks, no account required. The printed output shows the full TAB with your title, BPM, and time signature at the top.
Can I import TABs from other sources into the TAB Creator?
Yes — the TAB Creator supports editable imports. You can paste TAB text from external sources and load it into the editor for playback and modification. Use the Load button to import previously saved TABs or paste TAB content in the supported format.
How do I write a chord in TAB format?
To write a chord in TAB, place the fret numbers for each string you want to play in the same vertical column — all on the same beat. For example, an open G chord would show 3 on the Low E, 2 on the A, 0 on the D, 0 on the G, 3 on the B, and 3 on the high e, all in the same column. In the TAB Creator, click all six cells in the same beat column and enter the fret numbers for each string.
What’s the difference between TAB and chord diagrams?
A chord diagram (also called a chord chart or chord box) shows a static snapshot of where to place your fingers for one specific chord shape. It’s a vertical grid showing frets and strings from the front of the neck. Guitar TAB is a horizontal notation that shows a sequence of notes or chords played over time. Both are useful — chord diagrams for learning chord shapes, TAB for learning melodies, riffs, and how chords move in a song.
Write your first TAB now
Free, instant, no sign-up. Open the TAB Creator, enter a riff, play it back, and print it — all in under two minutes.
Open TAB Creator
Generate a Lick
Backing Tracks
Related reading
Writing TABs pairs naturally with the tools you use to build the parts — see Guitar Chord Analyzer: Identify Any Chord and Build Progressions Online and How to Create Guitar Backing Tracks for Practice.