Finding the right amp settings and shaping your guitar tone are critical for developing a sound that fits your style and cuts through in any context. Many guitarists struggle to achieve the tones they hear on records or in their heads, but with a clear approach to amp controls and tone settings, you can consistently dial in sounds that suit pop, blues, rock, metal, and more. This guide gives you a direct, hands-on method for adjusting your amplifier and guitar controls to get the most out of your rig. You’ll learn how to set up your amp from scratch, tweak your sound for different genres, and avoid common pitfalls that can ruin your tone. Each section includes specific examples and settings, making it easy to apply the advice whether you’re practicing at home, recording, or playing live. Using structured steps and leveraging tools like those at Harniciuk Sonic, you’ll build both confidence and consistency in your guitar tone shaping workflow.
Understanding Amp Settings & Tone Shaping for Guitarists
At its core, amp settings and tone shaping involve adjusting the controls on your amplifier—gain, EQ (bass, mids, treble), volume, presence, and reverb—as well as your guitar’s own tone and volume knobs. Each adjustment alters the frequency balance, gain structure, and dynamic response of your instrument. For example, increasing gain introduces more distortion and sustain, while adjusting EQ controls like bass and treble can make your sound thicker or brighter. Presence is often used to add clarity and articulation, especially at higher volumes or in a band context.
Different genres and playing techniques require different tonal characteristics. For instance, jazz guitarists often prefer clean, warm tones with rolled-off highs and boosted mids, while metal players look for tight, aggressive distortion with controlled bass and pronounced high-end. Single-coil pickups tend to sound brighter and may need less treble from the amp, whereas humbuckers are fuller and may require more midrange cut. Understanding how each control on your amp and guitar interacts is key to quickly achieving the tones you want.
Practical tone shaping also means adapting your settings to your playing environment. What works well in a bedroom may not work on stage. Factors such as room acoustics, speaker placement, and playing volume can all affect how your settings sound. Using reference tracks and tools for A/B comparisons, as well as experimenting regularly, helps you refine your tone for any situation. For more advanced tone shaping, incorporating effects pedals or digital processors can offer even more flexibility, but the foundation always starts with good amp settings.
Step-by-Step Workflow: Dialing In Your Amp and Tone
1. Set Everything to Neutral and Listen
Begin with your amp’s bass, mids, and treble at 12 o’clock (straight up) and set gain, presence, and reverb to their minimum or just above off. Keep your guitar’s volume and tone fully open. This gives you a clear, uncolored starting point. Play through some basic chords and single-note lines to hear the natural voice of your guitar and amp combination. For example, try an open G chord and a pentatonic lick on a Fender Stratocaster with single-coils, then repeat on a Gibson Les Paul with humbuckers to notice the difference. Take note of any immediate issues—excessive muddiness, harsh treble, or lack of sustain—before touching the controls. This first listen is crucial for identifying what your rig naturally does well and what might need correction.
2. Raise Volume and Dial In Gain for Your Style
Increase the amp’s volume to a comfortable level for your space, then gradually bring up the gain or drive knob. For clean genres like funk or pop, keep gain low—for example, set a Roland JC-120 or Fender Twin at 2/10 for sparkling cleans. For blues or classic rock, set gain around halfway for grit and sustain—try a Marshall DSL40 at 5/10 for classic crunch. Metal and hard rock tones may require higher gain, such as setting a Peavey 6505 or Mesa/Boogie Dual Rectifier at 7-8/10, but beware of going too far, as too much will mask articulation. If your amp has a master volume, use it to control overall loudness without altering gain structure. Listen for unwanted hiss or noise, and back off the gain if the sound starts to lose clarity or definition.
3. Shape EQ: Adjust Bass, Mids, and Treble Thoughtfully
Once your gain and volume are set, move to the EQ. Increase bass only until the tone feels full without becoming boomy—especially important if you’re using humbuckers or larger speakers. For example, with a PRS Custom 24 through a Vox AC30, keep bass around 5/10 to avoid mud. Adjust mids to taste: boosting them helps your guitar stand out in a mix, while cutting mids creates a modern, scooped sound but risks getting lost in a band setting. With a Stratocaster in a funk band, try mids at 6/10 for presence; for metal on an Ibanez RG, cut mids to 3/10 for a scooped tone. Treble should be added slowly, just enough to keep your attack crisp and articulate—on a Telecaster, too much treble can sound piercing, so start at 4/10 and increase as needed. Test your settings by playing both chords and lead lines, and listen for balance between warmth and clarity. Make small adjustments and re-evaluate as you go.
4. Add Presence, Resonance, and Reverb for Depth
If your amp features presence or resonance controls, use these to fine-tune the high and low ends of your sound. Presence boosts the upper frequencies, adding shine and bite, while resonance can thicken the low end. For example, on a Marshall JVM, presence at 6/10 adds clarity for solos, while resonance at 4/10 keeps the bottom end tight. Apply these sparingly, as too much can make your sound harsh or flabby. Reverb is useful to add space and dimension; start low (1-2/10) and increase until your tone feels lively but not washed out. For surf rock on a Fender Deluxe Reverb, try reverb at 3/10 for classic ambience. Be mindful that effects like reverb and delay can mask sloppy playing or muddle fast passages, so always check your tone in context by playing both rhythm and lead parts.
5. Refine with Guitar Controls and Pickup Selection
Your guitar’s tone and volume knobs, as well as pickup selector, offer fast tone-shaping options. Rolling back the tone knob can reduce harsh highs, while lowering the volume cleans up an overdriven sound for dynamic control. For example, on a Les Paul, roll the bridge pickup tone to 7/10 for smoother leads. Try switching between pickups: the bridge pickup gives a sharper, more aggressive sound (great for classic rock riffs on a Telecaster), the neck pickup is warmer and rounder (ideal for jazz chords on an ES-335), and the middle position blends both. Use these controls as part of your regular playing technique—especially when moving between verse and chorus, or rhythm and lead roles. Practice adjusting on the fly to get comfortable with quick tonal shifts.
6. Test in Context: Use Backing Tracks and Recording
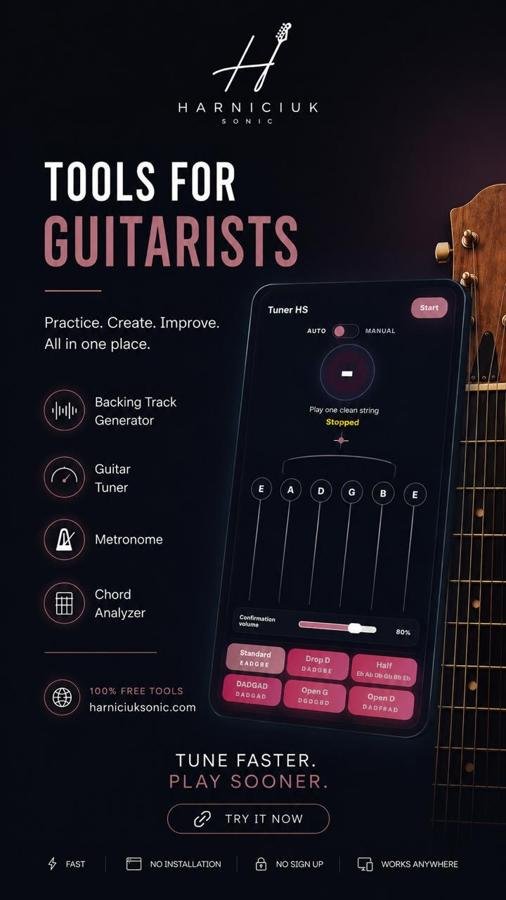
Play along with a backing track or record yourself over a band mix to hear how your tone fits with other instruments. A guitar sound that seems perfect solo can vanish or become overwhelming in a full mix. Make minor EQ tweaks if your guitar gets lost or clashes with vocals, bass, or drums. Use tools like the backing track generator for quick, genre-specific jam tracks. For example, play a blues shuffle on a Stratocaster over a backing track to check if your mids cut through. Consider recording short clips to compare tones and make more objective decisions about your sound. Always check your settings at gig volume if possible, as amp and speaker response changes with loudness.
Recommended Settings and Practical Genre Examples
Here are reliable starting points for popular guitar styles. Use these as a foundation and adjust to taste and environment:
- Clean (Pop/Funk/Jazz): Gain 2/10, Bass 5/10, Mid 6/10, Treble 4-5/10, Presence 3-4/10, Reverb 2/10. Neck pickup, tone slightly rolled off for warmth. For example, use a Fender Stratocaster on the neck pickup into a Roland JC-120 with these settings for crisp funk rhythms or smooth jazz chords.
- Classic Rock: Gain 5/10, Bass 5/10, Mid 7/10, Treble 6/10, Presence 6/10, Reverb 3/10. Bridge pickup for leads, middle for chords. Try a Gibson Les Paul through a Marshall DSL40 for punchy riffs and soaring solos.
- Blues: Gain 4/10, Bass 6/10, Mid 8/10, Treble 4/10, Presence 5/10, Reverb 4/10. Roll back guitar volume for cleaner licks, use neck or middle pickup for roundness. Use a Fender Telecaster on the neck pickup into a Fender Blues Junior for classic blues tones.
- Metal: Gain 8/10, Bass 6/10, Mid 2-3/10, Treble 7/10, Presence 7/10, Reverb 1-2/10. Bridge pickup, palm muting for tightness, avoid excessive bass which can muddy riffs. For example, play an Ibanez RG with active pickups into a Peavey 6505 for aggressive chugs and articulate leads.
After setting these, play both rhythm and lead passages, and tweak each control by small increments. Listening to isolated guitar tracks from your favorite songs can provide additional reference points. Using a tone analyzer or EQ visualizer can also help you see how your settings affect the overall frequency response.
Common Mistakes in Amp Settings & Tone Shaping
- Too Much Gain: Overdriving your amp leads to excessive noise, muddiness, and loss of note clarity. Always reduce gain until each note rings out, then add just enough for your desired sustain or crunch. For example, with a Mesa/Boogie Dual Rectifier, avoid pushing gain past 7/10 unless you need extreme saturation.
- Extreme EQ Settings: Maxing or minimizing EQ controls often results in boxy, harsh, or lifeless tones. Start with everything at noon and make small, deliberate changes based on what you hear, not guesswork. On a Fender Hot Rod Deluxe, avoid setting treble or bass above 8/10 to prevent shrill or muddy sounds.
- Scooping Mids Excessively: While a scooped midrange can sound impressive solo, it usually causes your guitar to disappear in a live or recorded mix. Keep mids in the 5-7/10 range for most applications unless you specifically want a vintage or modern scooped sound. For example, in a metal band, try mids at 4/10 on a Peavey 6505 to balance cut and aggression.
- Ignoring Room Acoustics: Settings that sound great at home may translate poorly on stage or in a different room. Always test your tone at performance volume in the actual environment you’ll be playing in, and adjust as needed. For instance, a Vox AC15 may sound bright at home but need less treble in a tiled rehearsal space.
- Overlooking Guitar Controls: Many players forget that subtle adjustments to the guitar’s own tone and volume knobs can be more effective than drastic amp changes. Practice using these controls as part of your tone-shaping process. For example, on a Stratocaster, rolling the tone knob back to 6/10 can tame harsh highs during solos.
Frequently Asked Questions
- How do I match my amp settings to a specific recorded guitar tone?
Start by listening closely to the isolated guitar part in the recording. Note the level of distortion, brightness, and body. Use the recommended genre settings as a baseline, then adjust gain, EQ, and presence until your tone closely resembles the reference. It can be helpful to record yourself and A/B with the original to fine-tune the details. For example, to mimic John Mayer’s “Slow Dancing in a Burning Room” tone, use a Stratocaster with low gain, boosted mids, and moderate reverb. - Why does my amp sound good at home but bad at rehearsal or gigs?
Room acoustics and volume have a significant impact on how amp settings behave. What works at low bedroom volumes may become harsh or muddy in a larger space or at higher levels. Always test your settings at the volume you’ll use in practice or performance, and adjust EQ and presence to suit the room and band mix. For example, a setting that works for a small combo amp at home may need less bass and more mids on stage. - Do I need to change amp settings when switching guitars?
Yes—different pickups (single-coil vs. humbucker), body woods, and electronics all affect tone. Humbuckers may need less gain and treble, while single-coils often benefit from a bit more midrange. Reset your amp to neutral when switching guitars and adjust gain and EQ for each instrument. For example, switching from a Telecaster to a Les Paul, reduce treble and gain to avoid muddiness. - How can I reduce unwanted noise or hum from my amp?
High gain settings, single-coil pickups, and poor-quality cables are common noise sources. Use shielded cables, keep gain at a reasonable level, and make sure your amp and pedals are properly grounded. If noise persists, consider a noise gate pedal or checking for interference from nearby electronics. For example, using a Boss NS-2 noise suppressor can help tame hiss in high-gain setups.
Final Practical Takeaway
Consistent, great guitar tone comes from a structured approach: start neutral, adjust gain and EQ for your style, and always check your sound in the context you’ll be playing. Use both amp and guitar controls for dynamic tone shaping, and test your settings with backing tracks or in a band mix. Reference tones and the Harniciuk Sonic workflow help you quickly identify and resolve common tone issues. Regular practice and experimentation ensure your amp settings always suit your current gear, style, and environment—making your playing sound its best, every time.