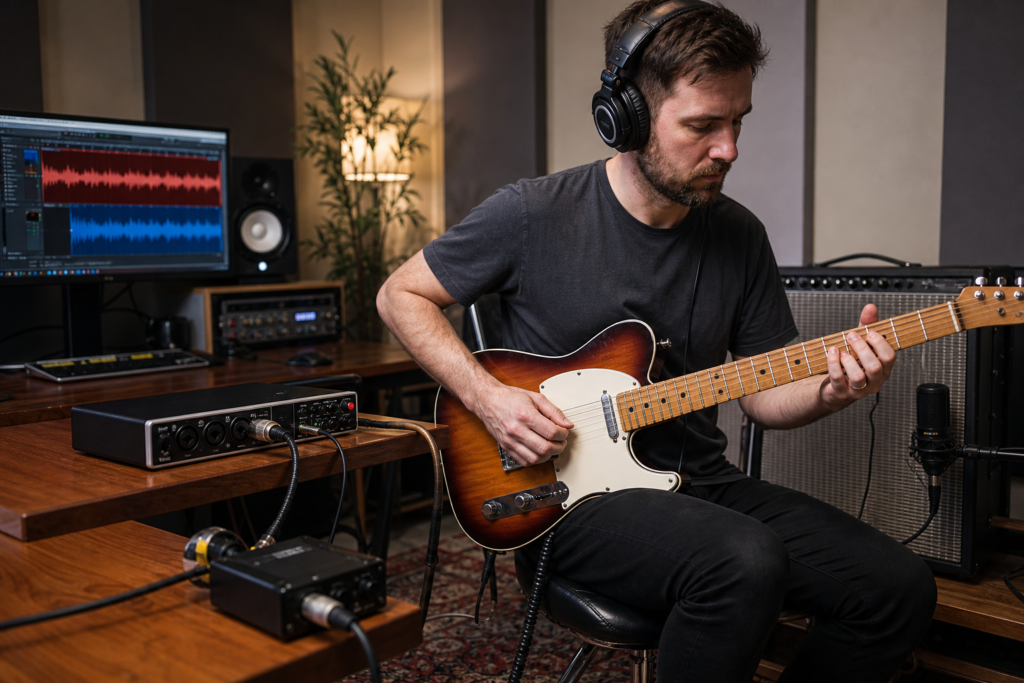
To record guitar DI and amp signals at the same time, you’ll need to split your guitar’s signal: one path captures a clean direct input (DI) before your amp or pedals, while the other records your amp’s tone via a microphone. This dual-track method is essential for guitarists who want maximum flexibility in mixing, reamping, or layering. With both tracks, you can blend the clarity and punch of a DI with the warmth and color of your amp—crucial for modern home recording and professional studios alike. This guide covers everything: why you’d want to record both, what gear and routing you need, how to avoid phase issues, and how to label, mix, and use these tracks with tools like Harniciuk Sonic’s Mix & Master workflow. If you’ve run into tracks that don’t sit right in a mix or wish you could tweak your tone after recording, this workflow is a practical solution. By following the steps below, you’ll be set up for a flexible, frustration-free session that’s ready for creative processing and pro-level results. For example, if you’re recording a Fender Stratocaster through a tube amp and want the option to later reamp with a different pedal chain, this workflow gives you that freedom.
What Does It Mean to Record Guitar DI and Amp Signals at the Same Time?
Recording both DI and amp signals in parallel means capturing two separate audio tracks from your guitar performance: one direct (DI) signal taken before your amp or pedals, and one mic’d signal from your amplifier’s speaker. This approach is common in rock, metal, pop, and even acoustic music, as it gives you the option to blend, reamp, or process guitar tones after tracking. The DI signal is a pure, unprocessed snapshot of your guitar’s output—ideal for reamping or running through amp simulation plugins. The amp signal, captured by a microphone in front of your speaker, reflects the real-world sound of your amp, pedals, and room.
For instance, a guitarist recording a heavy rhythm part on a Gibson Les Paul can keep the DI track as a fail-safe for future reamping, while the mic’d amp track might deliver the aggressive, harmonically rich sound needed for the mix. Mixing both signals together can add definition and presence (from the DI) to the body and warmth (from the amp). This setup also makes it easier to experiment with advanced techniques like parallel compression, phase alignment, and creative processing inside DAWs. Tools like Harniciuk Sonic’s Mix & Master workflow are designed to help you get the most from this flexible approach, letting you fine-tune your tracks with clarity and punch. For acoustic players, using a Taylor 314ce’s pickup as DI and a condenser mic on the 12th fret can yield a blend of direct attack and natural resonance.
Step-by-Step Workflow: How to Record Guitar DI and Amp Signals
1. Gather and Connect Your Gear
Start by preparing everything you’ll need: a guitar (such as a Fender Telecaster), your amp (like a Vox AC15), a DI box (active or passive, e.g., Radial J48), a dynamic microphone (e.g., Shure SM57), mic stand, quality instrument and XLR cables, and an audio interface with at least two inputs (such as a Focusrite Scarlett 2i2). The DI box splits your guitar’s signal—one output (the ‘thru’ or ‘link’) goes to your amp, and the other (usually XLR) goes to your interface’s instrument input. If your interface already has a dedicated Hi-Z input, you might be able to go direct without a DI box, but using one helps eliminate ground loops and delivers a balanced, noise-free signal. Double-check that your DAW can record multiple inputs simultaneously and that all cables are in good condition to avoid unwanted noise or dropouts. For bassists, using an Ampeg SVT amp and a DI from a Music Man StingRay can capture both punch and warmth.
2. Set Up Your Signal Chain and Routing
Connect your guitar to the DI box’s input. Use the ‘thru’ output to send the signal to your amp as you normally would for live playing. Take the main DI output (XLR or 1/4” TRS) and plug it into one channel of your audio interface. Next, set up your microphone in front of your amp’s speaker—start with the mic about 2 inches from the grill, slightly off-center from the dust cap for a balanced frequency response. For example, placing a Sennheiser e609 on a Marshall 4×12 cab can yield a classic rock sound. Run the mic cable into your interface’s second input. This setup ensures you’re recording both the raw DI and the colored amp signal simultaneously, each to its own track. For acoustic guitar, use a DI from the pickup and a large-diaphragm condenser like an AKG C214 aimed at the 12th fret.
3. Configure and Test Input Levels
In your DAW, create two mono tracks: one for the DI, one for the amp. Set the input gain on each interface channel so that neither signal clips—aim for peaks between -12dB and -6dB. Play your guitar as you would during the actual take, strumming both soft and loud passages to test headroom. Use headphones to listen for unwanted hum, buzz, or interference. If you’re running pedals, decide whether you want your DI to be completely dry (place the DI box before pedals) or include effects (DI after pedals). For example, if you want to capture a Strymon BigSky reverb on your DI, place the DI after the pedal. Adjust amp volume and EQ so the mic’d track sounds full and clear, avoiding excessive high-end harshness or boomy lows. Try rolling back the treble on a Fender Twin Reverb if the sound is too bright.
4. Arm Tracks, Record a Test Take, and Check for Phase Issues
Arm both tracks in your DAW and record a short test take. Listen to each track separately and then blended together. If the combined sound feels thin or hollow, you may have a phase alignment problem. To fix this, try nudging one track slightly (start with 0.2–1 ms) or use your DAW’s phase invert option on one channel. You can also adjust your mic position (moving closer or further from the cone, or changing angle) to reduce phase issues. For example, moving a Royer R-121 ribbon mic slightly off-axis on a Mesa Boogie cab can help. Once your test take sounds punchy and full, you’re ready for the actual recording session. Name your tracks clearly (e.g., ‘Rhythm_L_DI’ and ‘Rhythm_L_Amp’) for easy editing later.
5. Record, Save, and Organize Your Tracks
With everything dialed in, record your guitar part. After each take, listen back to both the DI and amp tracks separately and together, making sure there’s no clipping, noise, or phase weirdness. Save and label your files with clear names including song, part, DI/amp, and take number (e.g., ‘Verse1_DI_Take2.wav’). Back up your session files and audio regularly. Keeping your tracks organized will make post-production (editing, comping, and mixing) much smoother, especially if you plan to use advanced techniques in your mixing and mastering workflow. If you want to experiment further, try recording additional takes with different mic positions or pedal settings for more tonal options later. For example, record one take with a Tube Screamer in your amp chain and another clean for more mixing flexibility.
Recommended Settings and Practical Examples
For most electric guitars, set your DI input gain so that the loudest strums or pick attacks peak between -12dB and -6dB. This provides enough headroom to avoid digital clipping while keeping your signal strong. For the amp mic, start with the microphone about 2–3 inches from the speaker grill, positioned just off the center of the cone for a balanced sound. If your amp is particularly bright or dark, adjust the mic angle or distance to taste—moving the mic toward the edge of the speaker will mellow out harsh highs, while closer to the center increases brightness and attack.
Try this practical example: record a clean DI before your pedalboard, then a second DI after your drive pedal for a ‘wet’ version. For the amp, use a classic rock crunch setting with gain at 4/10, mids at noon, bass at 11 o’clock, treble at 1 o’clock, and master volume to taste. For phase alignment, if you hear comb filtering when blending, nudge the DI track forward by 0.5 ms at a time until the sound thickens. If you’re using a PRS Custom 24 through a Mesa/Boogie Mark V, document your amp and pedal settings for future reference. These starting points can be adjusted for your room, guitar, and mix preferences. If you’re planning to use amp sims or reamp, keep your DI as clean as possible and document your settings for repeatability.
Common Mistakes and How to Avoid Them
- Ignoring phase alignment: Not checking for phase issues can result in thin, weak guitar tone when blending tracks. Always solo both tracks together and use your DAW’s phase tools or manual nudging to achieve a punchy, coherent sound. For example, phase issues are common when using both a DI and a mic’d Orange Rockerverb amp.
- Setting input gain too high: Clipping during recording causes irreversible digital distortion. Keep peaks between -12dB and -6dB for both DI and mic inputs, and always test with your hardest strums before tracking. This is especially important with high-output pickups like those on an Ibanez RG series.
- Poor mic placement: Miking the center of the speaker can sound harsh or fizzy, while too far to the edge may sound dull. Experiment with position and angle—move the mic in 1/2-inch increments and record short test samples to compare. Using a Shure SM57 on a Fender Deluxe Reverb, for example, try both center and edge positions to find the sweet spot.
- Not labeling tracks and files: Failing to label takes clearly can make editing and mixing confusing. Always include song, part, DI/amp, and take number in your track names and file exports. For example, ‘Solo2_Amp_Take3.wav’ is much clearer than ‘Audio 5’.
- Overlooking ground loops or cable quality: Hum or buzz from bad cables or improper grounding can ruin takes. Use balanced cables where possible, separate instrument and power cables, and ensure your DI box is properly grounded. If you hear persistent noise, try a different outlet or DI box. This is especially important when recording with high-gain amps like a Peavey 6505.
Frequently Asked Questions
- Why should I record both DI and amp signals?
Recording both gives you flexibility to blend tones, reamp, or use amp sims in post-production. If your amp sound isn’t ideal, the DI lets you reprocess your performance without re-recording. This method also acts as a backup if you need to fix parts later, making it a core workflow for modern guitarists. For example, if you record a DI with a Stratocaster and later want a heavier tone, you can reamp through a different amp or use plugins. - Is a DI box necessary if my audio interface has an instrument input?
A quality audio interface’s instrument input can capture a usable DI, but a dedicated DI box often provides a cleaner, lower-noise signal—especially when splitting to an amp. A DI box with a ‘thru’ output ensures you don’t lose tone or add latency, and helps prevent ground loops. For the most professional results, use a DI box. For example, the Radial ProDI is a popular choice for both studio and stage. - How do I fix phase issues between my DI and amp tracks?
Phase issues are common because the mic’d amp signal arrives slightly later than the DI. In your DAW, zoom in and nudge one track by small increments (0.2–1 ms), or use a phase invert button if available. Always listen for a fuller, more focused sound when both tracks are played together, and adjust as needed. Some DAWs have visual phase alignment tools as well. For example, Logic Pro X offers sample-accurate editing for precise alignment. - Can this method be used for acoustic or bass guitar?
Absolutely. For acoustic, record the DI from the pickup and mic the body for a blend of attack and resonance. For bass, DI is often preferred for clarity, but miking a bass amp can add warmth and grit. Adjust mic placement and gain structure for each instrument, and always check for phase issues when blending. For example, recording a DI from a Fender Precision Bass and miking an Ampeg SVT cab gives you both punch and depth.
Final Practical Takeaway
Recording guitar DI and amp signals at the same time is a practical way to future-proof your tracks and simplify your workflow in mixing and reamping. By capturing both a clean DI and your amp’s character, you’ll have endless tonal options and flexibility in post-production—without having to redo takes. Careful setup, phase checking, and organized labeling will keep your sessions smooth and professional. Build this workflow into your recording habits and use tools like Harniciuk Sonic’s Mix & Master workflow to get the most from every session. For more guitar recording tools, visit the Harniciuk Sonic guitar tools hub and keep your creative process efficient and fun.